Using Node.js on the IBMi
paste bin: some interesting node.js examples
- My first script in node.js
- A few notes on Tools and Techniques
- Built-in modules
- Built-in values and functions
- What does not work in node.js?
- Four ways to declare variables in JavaScript
- Some characteristics of functions in JavaScript
- Creating and Importing modules
- Create a Simple http web server application
- Install the Express application framework for node.js
- Create a simple Express web server application
- Use sendFile() function to deliver a file to the browser
- Generating dynamic web content using web Express Server and the ejs simple templating language
- Using the idb-connector to access data on IBMi
- Using the idb-connector with fetchAll
- Using the idb-pconnector (promise-based database connector) to access data on IBMi
- SQL read and display data on web page.
- Using IBM iToolkit to call a service program
My first script in node.js
Node.js is an environment that allows you to write JavaScript that interacts with different parts of the outside world other than the browser. Most of the language that you use in the browser will also work in node.js. Forexample, JavaScript offers the following conditional statements:
- Use if to specify a block of code to be executed, if a specified condition is true
- Use else to specify a block of code to be executed, if the same condition is false
- Use else if to specify a new condition to test, if the first condition is false
- Use switch to specify many alternative blocks of code to be executed
Example
/*  program name:                   my_first_node_program.js                       */
/*  program location on IBMi IFS:  /home/username/                                 */
/*                                                                                 */
/*  to access ssh command line with your IBMi username and password:               */
/*  ssh username@pub400.com -p 2222                                                */
/*                                                                                 */
/*   to run your node.js script:                                                   */
/*  -bash-5.1$ node my_first_node_program.js                                       */

const amount = 12;
if (amount < 10){
	console.log('small number');
	}
else{
	console.log('big number');
}
console.log('hello world!');
output
big number
hello world!
A few notes on Tools and Techniques
Editors: You can use the IBMi command WRKLNK command to navigate and edit node.js file, or any editor that supports the IBMi IFS including Visual Studio with Visual Studio "Code for IBM i" see Setup.
ssh: The ssh (Secure Shell) provides a secure encrypted connection between two hosts over an insecure network. This connection can also be used for terminal access, file transfers and other applications. You can start ssh from green screen command line using the ssh command:
ssh username@server.com -p 9999
Node package manager Node.js developers generally use the Node package manager (npm). npm is a package manager and software registry for node.js. It is used to install packages required by your application. The /node_modules folder contains external modules that your project depends upon. When you install modules with npm, they are downloaded from the web and copied into the node_modules folder and Node.js is trained to look for them there when you import them.
Initializing your project: Best practises:
1. Create a new project directory for each project and navigate into it using the ssh terminal.
mkdir myNewProject
cd myNewProject
2. Use init command to initialize a new project. This creates a package.json file that includes the project name and description as well as functional metadata like the package version number and a list of dependencies required by the application.
init myNewProject
Built in modules
Node.js includes some unique values, modules and functions not found in browser based JavaScript. For example:
- path - to handle file paths
- os - provides information about the operation system
- dns - to do DNS lookups and name resolution functions
- http to make Node.js act as an HTTP server
- https to make Node.js act as an HTTPS server.
// use built-in path module
const path = require('path')
console.log( path.parse(__filename));
console.log('path of filename is ' + path.dirname(__filename));
console.log('basename is ' + path.basename(__filename));
console.log('extension of file is ' + path.extname(__filename));

// use built-in os module
const os = require('os');
console.log('OS type is ' + os.type());
console.log('OS platform is ' + os.platform);
console.log('OS version is ' + os.version());
console.log('Home Directory is ' +  os.homedir());
output:path of filename is /home/username basename is server.js extension of file is .js OS type is OS400 OS platform is os400 OS version is 7 Home Directory is /home/username
Built in values and functions
Some useful node.js built-in values and functions:
console.log(__dirname);
console.log(__filename);
console.log(module);
console.log(process);
output:
/home/username
/home/username/server.js
{
  id: '.',
  path: '/home/username',
  exports: {},
  filename: '/home/username/server.js',
  loaded: false,
  children: [],
  paths: [
    '/home/username/node_modules',
    '/home/node_modules',
    '/node_modules'
  ]
}
process {
  version: 'v18.17.1',
  versions: {
    node: '18.17.1',
    acorn: '8.8.2',
    ....
What does not work in node.js?
Node.js is is a stand-alone JavaScript environment completely independent of a web browser. There's no intrinsic link between web browsers and JavaScript, so DOM and window objects are not part of the JavaScript language or specification.
As a result anything related to window object (window, document,screen, navigator, cookie) will not work.
// console.log(window.innerWidth);
// console.log(window.innerHeight);
// console.log(window.location.href);
// document.cookie = "username=John Doe";
// console.log(screen.height);
// console.log(navigator.cookieEnabled);
window.alert("hello world");
output on console
ReferenceError: window is not defined
Four ways to declare variables in JavaScript
1. var : The var scope is global when a var variable is declared outside a function. This means that any variable that is declared with var outside a function block is available for use in the whole window. The var variables can be re-declared and updated. This can be a problem as your code grows. The var variable is hoisted by JavaScript engine. It is initialized as undefined,
2. let: let is block scoped. It is only available for use within that block. let can be updated but not re-declared. let keyword is not initialized automatically. Added to JavaScript in 2015.
3. const: Like let declarations, const declarations can only be accessed within the block they were declared. const cannot be updated or re-declared. const declarations are hoisted to the top but are not initialized. Added to JavaScript in 2015.
4. var:The variables declared without the var keyword becomes global variables. To be avoided
var a = 5;
var b = 6;
var c = a + b;
console.log(c)

let d = 5;
let e = 6;
let f = d + e;
console.log(f)

const g = 5;
const h = 6;
const i = g + h;
console.log(i)

a = 5;
b = 6;
c = a + b;
console.log(c)
output:
11
11
11
11
Some characteristics of functions in JavaScript
// Some characteristics of functions in JavaScript
// reference: https://www.telerik.com/blogs/four-ways-to-create-a-function-in-JavaScript

// 1. A function as a statement
function Add_v1(num1,num2){
    let sum = num1+ num2;
    return sum;
}
let answer_v1 = Add_v1(7,8);
console.log("1.function as statement", answer_v1);   // = 15

// 2. A function as a statement (part 2)
// JavaScript lets us use function before declaring it.
// JavaScript will "hoist" function definition to the top
let answer_v2 = Add_v2(7,8);
console.log("2.function as statement with hoisting", answer_v1);   // = 15

function Add_v2(num1,num2){
    let sum = num1+ num2;
    return sum;
}

// 3. function as expression
let add_v3 = function a(num1,num2){
    let sum = num1+ num2;
    return sum;
}

let answer_v3 = add_v3(10,20);
console.log("3.function as expression", answer_v3);   // = 30

// 4. function using arrow operator
var add_v4 = (num1, num2)=> num1+num2;
let answer_v4 = add_v4(3,5);
console.log("4.function using arrow operator", answer_v4);  // = 8


// 5. A function as a statement returning an object
function getProduct(){
    let product = {
        Id:1,
        Title:'Book',
        Price: 30
    };
    return product;
}
let p1 = getProduct();
console.log("5. function returning an object", p1); // { Id: 1, Title: 'Book', Price: 30 }
output
1.function as statement 15
2.function as statement with hoisting 15
3.function as expression 30
4.function using arrow operator 8
5. function returning an object { Id: 1, Title: 'Book', Price: 30 }
Creating and Importing modules
In Node.js, modules are the blocks of encapsulated code that communicates with an external application on the basis of their related functionality. Modules can be a single file or a collection of multiples files/folders. Modules permit re-usability as well as the ability to break down a complex piece of code into manageable chunks. Every file is a module in node.js
The keyword to export = module.export
The keyword to use module = require('./file'). Note that if any code is executed in a module, then it will be executed when require is called.
// file math.js
// here we have created 5 functions in the math.js, but export only 3 of these functions
// (add, subtract, multiply, divide)

var theAnswerIs = (value)  =>  "The answer is " + value  ;
const add = (a,b) => theAnswerIs(a+b);
const subtract = (a,b) => theAnswerIs(a - b);
const multiply = (a,b) => theAnswerIs(a * b);
const divide = (a,b) => theAnswerIs(a / b);

module.exports = {add, subtract, multiply}
// Using a module. Use "require" to import module
const math = require('./math')
console.log(math.add(100,100))
console.log(math.subtract(100,50))
console.log(math.multiply(100,3))
console.log(math.divide(100,20))

// This last one should fail because divide() function was not exported.
// theAnswerIs() and divide() functions were hidden because they were not exported.
output. Note error on divide funtion()
-bash-5.1$ node use_math.js
The answer is 200
The answer is 50
The answer is 300
/home/username/use_math.js:7
console.log(math.divide(100,20))
Create a Simple http web server application
Node.js has a built-in module called HTTP, which allows Node.js to transfer data over the Hyper Text Transfer Protocol (HTTP). To include the HTTP module, use the require() method.
The http.createServer() method creates an HTTP Server object turning your computer into a web server.
// script name : web.js
// to execute : node web.js
// to view in web browser: // http://185.113.5.134:3030/

const http = require('http');
const server = http.createServer(function(req, res) {
      if (req.url === '/' ) {
      // console.log(req);
      res.statusCode = 200;
      res.setHeader('Content-Type', 'text/plain');
      res.end('Hello, World!\n');
      }
});

server.listen(3030, function()  {
  console.log('Server listening on port 3030');
});
to execute
-bash-5.1$ node web.js
output:
Install the Express application framework for node.js
Express js is a minimal and flexible Node.js web application framework that provides a robust set of features for web and mobile applications.
Express as a whole is known as a framework, not just as a module. It gives you an API, submodules, functions, and methodology and conventions for quickly and easily typing together all the components necessary to put up a modern, functional web server with all the conveniences necessary for that (static asset hosting, templating, handling CSRF, CORS, cookie parsing, POST data handling, and many more functionalities.
npm install express
Create a simple Express web server application
// to view in web browser
// http://185.113.5.134:3030/

const express = require('express');
const app = express();

app.get('/', function (req, res) {
   res.send('Hello World. This is an express server instance.');
})

const server = app.listen(3030, function () {
    const host = server.address().address
    const port = server.address().port

   console.log("Example app listening at http://%s:%s", host, port)
})
Use sendFile() function to deliver a file to the browser
The sendFile() function transfers the file at the given path and it sets the Content-Type response HTTP header field based on the filename extension.
The script uses __dirname to get absolute path of the directory containing the currently executing file, so we don't have to hard code it.
const express = require('express');
const path = require('path');
const app = express();

app.get('/', function (req, res) {
   res.sendFile(path.join(__dirname, 'index.html'));
});

app.get('/about', function (req, res) {
    res.sendFile(path.join(__dirname, 'about.html'));
 });

const server = app.listen(3030, function () {
   const host = server.address().address
   const port = server.address().port

   console.log("Example app listening at http://%s:%s", host, port)
})
file: about.html
<!DOCTYPE html>
<html>
<body>

<h3>This is the About page!</h3>

</body>
</html>
output:

Install the ejs simple templating language
ejs is a simple JavaScript templating language that lets you generate HTML markup with plain JavaScript.
npm install ejs
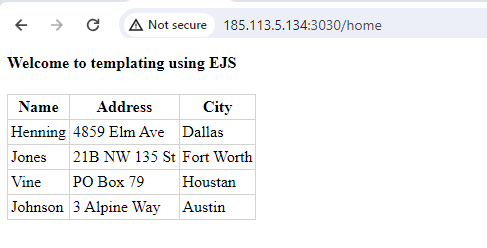
Generating dynamic web content using web Express Server and the ejs simple templating language
var express = require('express');
const app = express();

// set the view engine to ejs
app.set('view engine', 'ejs');

// index page
app.get('/home', function(req, res) {

   const suppliers = [
    {"LSTNAM":"Henning ","STREET":"4859 Elm Ave ","CITY":"Dallas"},
    {"LSTNAM":"Jones   ","STREET":"21B NW 135 St","CITY":"Fort Worth"},
    {"LSTNAM":"Vine    ","STREET":"PO Box 79    ","CITY":"Houstan"},
    {"LSTNAM":"Johnson ","STREET":"3 Alpine Way ","CITY":"Austin"}
   ];

   const header = "Welcome to templating using EJS";

  res.render('supplier_list', {
    suppliers: suppliers,
    header: header
  });
});

app.listen(3030);
console.log('Server is listening on port 3030');
ejs makes use of a file in /views directory for output
save this file to /views/supplier_list.ejs
<!DOCTYPE html>
<html lang="en">
<head>
    <style>
    table {
         border-collapse: collapse;
    }
    td,th {
        border: 1px solid lightgray;
        padding: 3px;
    }

    </style>
</head>

    <h4><%= header %></h4>

    <table>
        <tr>
            <th>Name</th>
            <th>Address</th>
            <th>City</th>
          </tr>
      <% suppliers.forEach(function(suppliers) { %>
        <tr>
          <td><%= suppliers.LSTNAM %></td>
          <td><%= suppliers.STREET %></td>
          <td><%= suppliers.CITY %></td>
        </tr>
      <% }); %>
    </table>

</body>
</html>
output:
then point your browser to <your_IP_address>/home
Using the idb-connector to access data on IBMi
The Node.js iDB Connector is an IBM i Node.js Db2 driver open source project from IBM. It permits easy access to IBM i DB2 databases using SQL.
see docs at npmjs.com: idb-connector
// program: get_data.js
// pre-requisite: npm install idb-connector

const {dbconn, dbstmt} = require('idb-connector');
const sSql = 'SELECT LSTNAM, STREET, CITY FROM QIWS.QCUSTCDT';
const connection = new dbconn();
connection.conn('*LOCAL');
const statement = new dbstmt(connection);

statement.exec(sSql, (x,error) => {
  if (error) {
    throw error;
  }
  console.log("%s", JSON.stringify(x));
  statement.close();
  connection.disconn();
  connection.close();
});
output:
-bash-5.1$ node get_data.js
[{"LSTNAM":"Henning ","STREET":"4859 Elm Ave ","CITY":"Dallas"},{"LSTNAM":"Jones   ","STREET":"21B NW 135 St","CITY":"Clay  "},{"LSTNAM":"Vine    ","STREET":"PO Box 79    ","CITY":"Broton"},{"LSTNAM":"Johnson ","STREET":"3 Alpine Way ","CITY":"Helen "},{"LSTNAM":"Tyron   ","STREET":"13 Myrtle Dr ","CITY":"Hector"},{"LSTNAM":"Stevens ","STREET":"208 Snow Pass","CITY":"Denver"},{"LSTNAM":"Alison  ","STREET":"787 Lake Dr  ","CITY":"Isle  "},{"LSTNAM":"Doe     ","STREET":"59 Archer Rd ","CITY":"Sutter"},{"LSTNAM":"Thomas  ","STREET":"3 Dove Circle","CITY":"Casper"},{"LSTNAM":"Williams","STREET":"485 SE 2 Ave ","CITY":"Dallas"},{"LSTNAM":"Lee     ","STREET":"5963 Oak St  ","CITY":"Hector"},{"LSTNAM":"Abraham ","STREET":"392 Mill St  ","CITY":"Isle  "}]
Using the idb-connector with fetchAll
Using idb-connector to access data on IBMi
const {dbconn, dbstmt} = require('idb-connector');

const sSql = 'SELECT STATE FROM QIWS.QCUSTCDT';
const connection = new dbconn();
connection.conn('*LOCAL');
const statement = new dbstmt(connection);

statement.prepare(sSql, () => {
  statement.execute(() => {
    statement.fetchAll((x) => {
      console.log(`Result is : ${JSON.stringify(x)}`);
      statement.close();
    });
  });
});
Using the idb-pconnector (promise-based database connector) to access data on IBMi
the idb-pconnector connector provide a promise-based database connector for DB2 on IBM i. This project is a promise-based wrapper over the idb-connector project that enables the use of modern JavaScript's async/await syntax.
see docs at npmjs.com: idb-pconnector
const {Connection, Statement} = require('idb-pconnector');

async function call_SQL(){

        const sql_stsmt = 'SELECT * FROM QIWS.QCUSTCDT';
        const conn = new Connection({ url: '*LOCAL' });
        const stmt = new Statement(conn);

        try {
            const x = await stmt.exec('SELECT * FROM QIWS.QCUSTCDT');
            stmt.close();
            conn.disconn();
            conn.close();

            return x;
        }
        catch (error) {
            return console.error(error);
            }
    }

async function main() {
    try{
        const result = await call_SQL()
        console.log("log from function main()");
        console.log("%s", JSON.stringify(result));
    }
    catch(error){
        return console.error(error);
    }
}

main();
SQL read and display data on web page.
This example reads data on IBMi using SQL and the idb-pconnector connector, then writes to the server using the express web application framework. Note use of keyword async and await to create and fulfill promises, insuring that the program waits for data before displaying web page
// pre-requisite: npm install idb-pconnector
// use http://185.113.5.134:3031/supplier_page to see page

const {Connection, Statement} = require('idb-pconnector');
const express = require('express');

const Web_display = (suppliers) => {
    const app = express();

    // set the view engine to ejs
    app.set('view engine', 'ejs');

    app.get('/supplier_page', function(req, res) {

    const header = "Accessing data idb-pconnector and templating results with EJS";

    res.render('supplier_list', {
        suppliers: suppliers,
        header: header
       });
    });

    app.listen(3031);
    console.log('Server is listening on port 3031');
}

const call_SQL = async () => {
        const sql_stsmt = 'SELECT * FROM QIWS.QCUSTCDT';
        const conn = new Connection({ url: '*LOCAL' });
        const stmt = new Statement(conn);

        try {
            const x = await stmt.exec('SELECT * FROM QIWS.QCUSTCDT');
            stmt.close();
            conn.disconn();
            conn.close();
            return x;
        }
        catch (error) {
            return console.error(error);
            }
    }

const main = async () => {
    try{
        const result =  await call_SQL()
        console.log("log from function main()");
        console.log("%s", JSON.stringify(result));
        // now we can present data on web page...
        Web_display(result);
    }
    catch(error){
        return console.error(error);
    }
}

main();
template file in /views/supplier_list.ejs
<!DOCTYPE html>
<html lang="en">
<head>
    <style>
    table {
         border-collapse: collapse;
    }
    td,th {
        border: 1px solid lightgray;
        padding: 3px;
    }

    </style>
</head>
    <center>
    <h3><%= header %></h3>
    <table>
        <tr>
            <th>Name</th>
            <th>Address</th>
            <th>City</th>
          </tr>
      <% suppliers.forEach(function(suppliers) { %>
        <tr>
          <td><%= suppliers.LSTNAM %></td>
          <td><%= suppliers.STREET %></td>
          <td><%= suppliers.CITY %></td>
        </tr>
      <% }); %>
    </table>
    <br><br>
    <img src="https://itpscan.ca/blog/node/images/node_logo.png"></img>
    </center>
</body>
</html>
output:
Using iToolkit to call a service program
This examples uses the iToolkit to call a service program
It calls the sine (sine) procedure in service program QSYS/QC2UTIL2 and get its return value. Service program QC2UTIL2 comes preinstalled with the IBM i operating system. Here we see that the sin of 0.8 is .717
// requires the itoolkit: npm install itoolkit
// more info @ https://www.seidengroup.com/2023/01/03/install-and-use-node-js-itoolkit-for-ibm-i/

const { Connection, ProgramCall } = require('itoolkit');
const { XMLParser } = require('fast-xml-parser');

const conn = new Connection({
    transport: 'odbc',
    transportOptions: { dsn: '*LOCAL'}
});

const program = new ProgramCall('QC2UTIL2', { lib: 'QSYS', func: 'sin' });

program.addParam({ name: 'angle', type: '8f3', value: '0.8', by: 'val' });
program.addReturn({ name: 'cos', type: '8f3', value: '' });
conn.add(program);

conn.run((error, xmlOutput) => {
    if (error) {
      throw error;
    }

    // uncomment next line if you want to see raw XML output
    // console.log(xmlOutput);

    // parse XML into JSON
    const XmlToJsonParser = new XMLParser();
    const result = XmlToJsonParser.parse(xmlOutput);

    // demonstrate how to extract parameter and return value
    console.log('Angle input: ' + result.myscript.pgm.parm.data + ' Sin result: ' + result.myscript.pgm.return.data);
});