Hosted payment forms (sometimes called "Redirect Payment" forms) are pages "hosted" on external, third-party sites to process electronic transactions (i.e. payments made with credit or debit cards). In order to successfully complete each transaction, online shoppers temporarily leave your site and get re-directed to third party site, key in their credit card information, and then return to your e-commerce store.
This process adds extra steps to your check out process and increases likelyhood of abandoned shopping cards, but has several important technical advantages including:
- Customer does not enter credit card information on your site, which greatly reduces risk of a hackers stealing credit card numbers from yor server.
- A reduced risk of being hacked reduces merchant liability
- Simplifies set up and maintenance of credit card interface
Steps to set up hosted payments with Moneris eSelect and Moneris 1.x, using software developed by Collins Harper.
Step 1: Log in to Moneris Merchant Resource Center to set up Account
To access Moneris Merchant Resource Center, use these links.
Development URL:
https://esqa.moneris.com/mpg/
Production URL:
https://www3.moneris.com/mpg/
Log in as directed by instructions on screen.
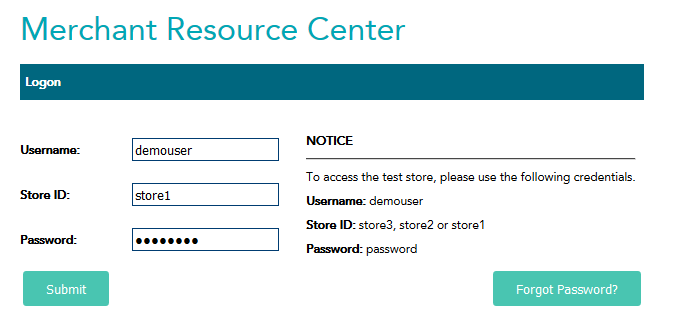
and goto Hosted Paypage Configuration page

Step 2: Create and configure New Account in Hosted Paypage Configuration section
There are eight configurations sections, each with its own Save button.
- Basic Configuration
- Transaction Type
- Payment Methods
- Response Method
- Paypage Appearance
- Response/Receipt Data
- Security Features
- Email Receipts
Here we discuss only some critical setup options.
Click on 'Generate a New Configuration' to create a new Hosted Paypage configuration.

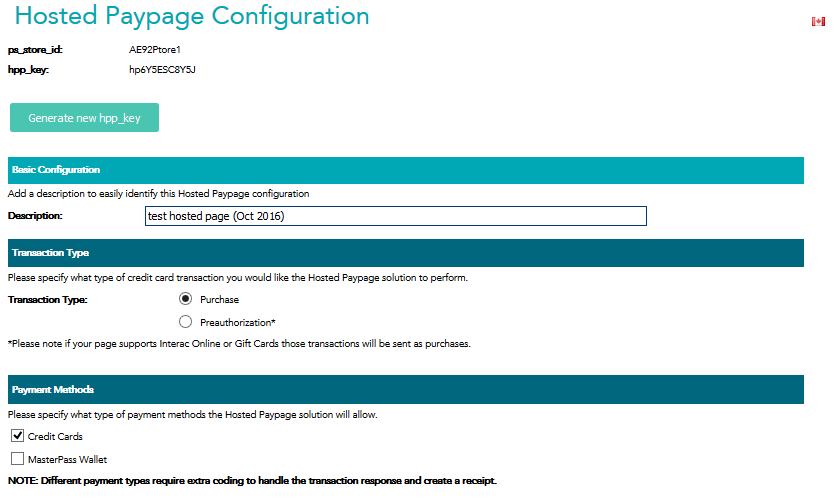
Provide a description to identify your configuration entry. For transaction type , we usually want a Purchase transaction, (not athorize with later capture like in car renatal industry). Take note of your ps_store_id and http_key. We will need these later.
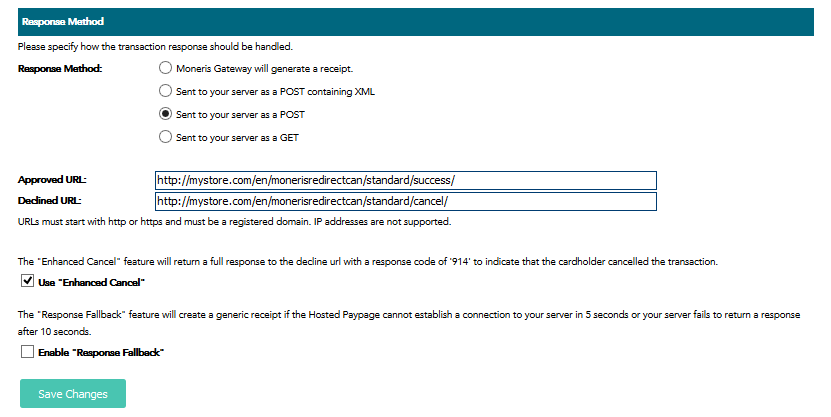
Reponse method should be post. Approval and Declined URLs are specific URLs provided by Magento module that display Approval and Declined conditions. These pages also capture values send by http post back to your server.
Note the links back to your site:
http://yoursite.com/en/monerisredirectcan/standard/success/
http://yoursite.com/en/monerisredirectcan/standard/cancel/
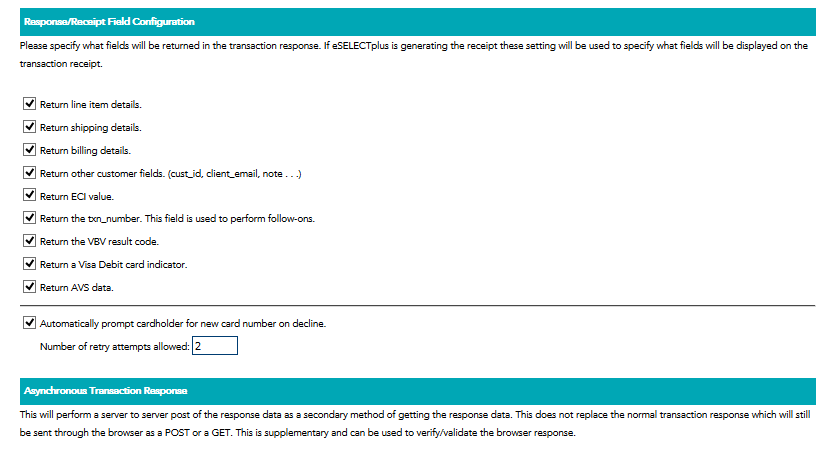
To be safe, check off all available information to be returned in transaction response, even if not all is required.

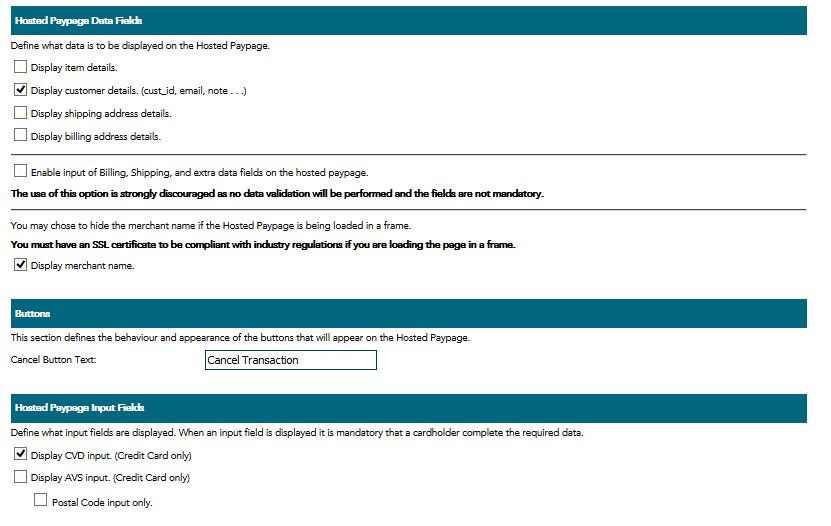
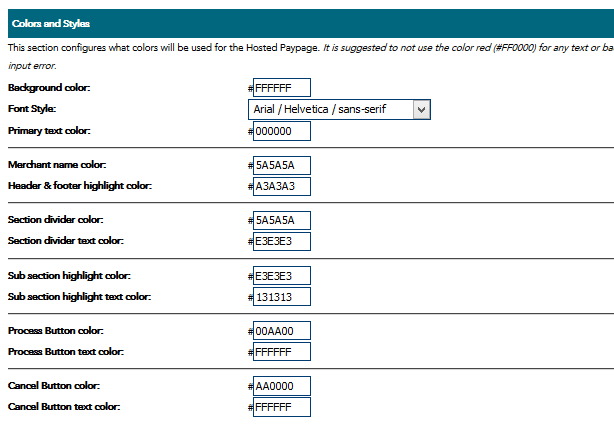
This section configures what colors will be used for the Hosted Paypage.
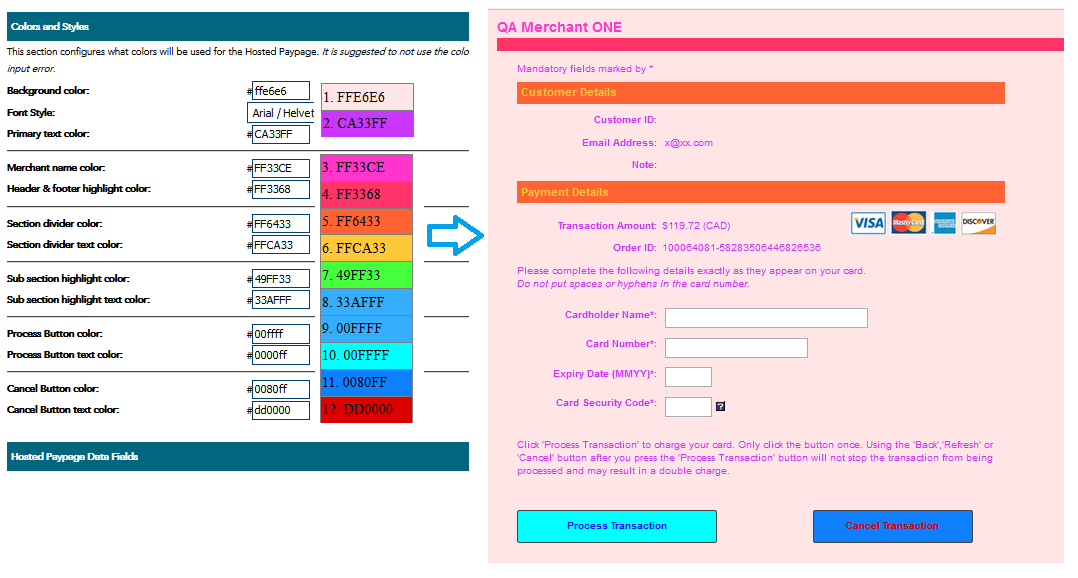
Here we tart up the design to see what cstomization is possible

Under paypage appearnce tab you have many options. You may want to enable the CVD option. Also here you can decide what logos you show on payment page.
Step 3 - in Magento - Harper Collins Moneris eSelect Hosted Module setup
In Magento Admin Console, Go to System > Configuration > Sales > Payment Methods. Click on "Moneris Payments Checkout with Redirect" to open its options.
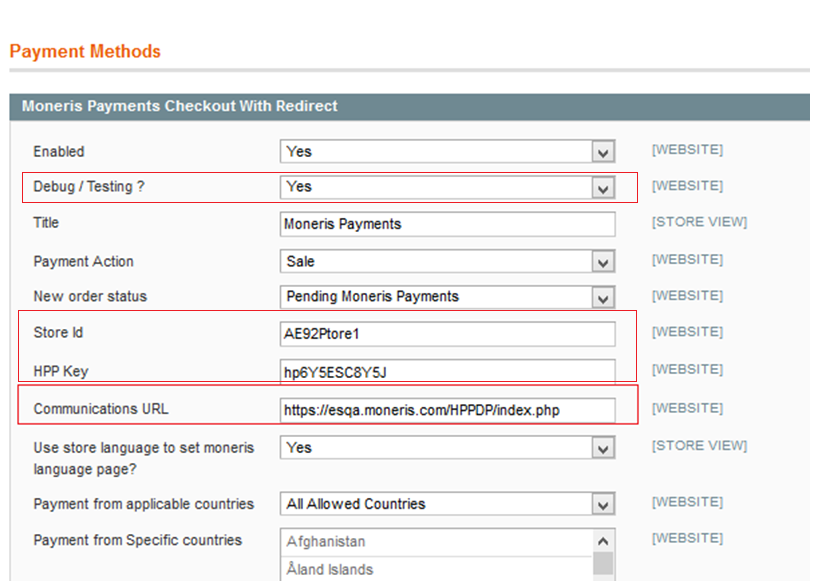
Web Service Endpoint - Production
https://www3.moneris.com/HPPDP/index.php
Web Service Endpoint - Development
https://esqa.moneris.com/HPPDP/index.php
The Store ID and HTTP key are provided in Moneris eSelect Hosted Paypage Configuration page.
Payment Screen
Once all set up, this is the screen that Customer will be presented with when making payment.
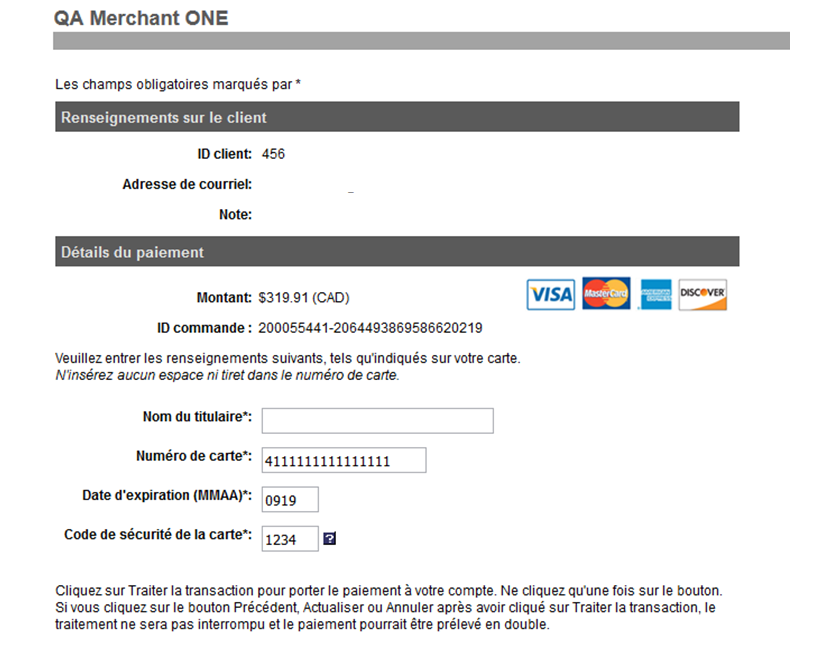
Some credit cards number used for testing:
MasterCard  5555555555554444
MasterCard  5105105105105100
Visa        4111111111111111
Visa        4012888888881881
Amex        378282246310005
Discover    6011111111111117
Discover    6011000990139424